Egg – head brains

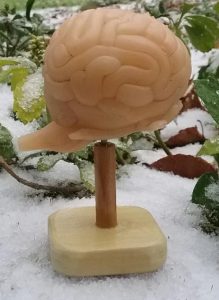
What mom do you know that would give this hand made brain to a daughter for christmas (LOL). Me, anatomist, biologist, science illustrator, nutty person, with a daughter just graduating from Wright State in behavioral sciences.

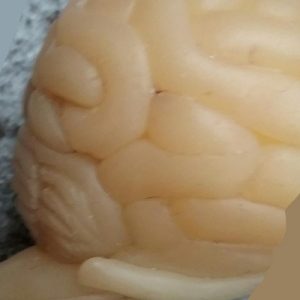
Real (emptied) chicken egg is the base of this egg head brain sculpture, covered with a very think layer of translucent polymer clay (to give it some stability). The folds in the brain were just made with a long rolled rope of translucent clay (which here certainly is not the highly convoluted brain of a very intelligent human) but is maybe like a mouse or rat.  You can still see some relevant convolutions, like the motor and sensory convolutions areas. I made the temporal lobe a little too flat, but it is still identifiable. The fun part was of course cerebellum with its unique surface patterning, convolutions on a different scale.

Olfactory bulbs and nerves and optic nerves are disproportionately large here, just for easy identification.  The egg brain can be removed from the stand and turned over where there is the optic chiasm, the there are mammillary bodies, and a pituitary (which would normally have been more hidden in the brain case, but I added here for fun).
Here is a link to read concerning a possible reason for convolutions, and a great video:

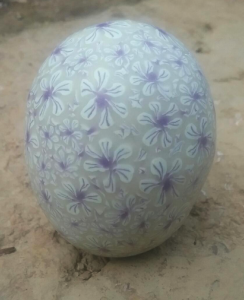
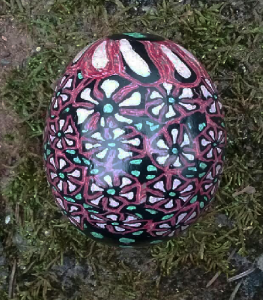
Early attempts at a polymer clay flower-cane egg.

One of my first attempts at a polymer clay egg made with a cane.  Canes were not really something I had tried before joining the 2016 Polymer Clay Challenge (online through facebook). I must say there are some great clay artists in that group.  That inspired me to try something new. I learned a few things, 1) it is easier to smooth the clay before curing than sanding it smooth after curing, 2) sandpaper leaves scratches, and the show up.  LOL.  But it is a technique for eggs that I really love.  So while this is not a great egg, it is a beginning. (lower image).

I feel better about the canes and eggs I make two years later, but still learning.

polymer clay over egg shell


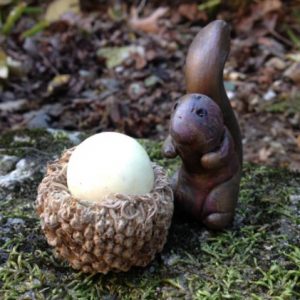
Squirrel, acorn cap, and fluorescent egg

Squirrel, acorn cap, and fluorescent egg made with polymer clay and a real cockatiel egg under the yellow fluorescent polymer clay which covers it. Squirrel was made with left over polymer clay that has flower petals in it from previous objects and a little brown and black polymer clay. I cured this squirrel on his side so his tail would not fall off in the baking.  And fyi, the acorn cap (which was from a Bur Oak (Burr Oak) or Mossycup Oak is really quite big (close to 2 inches) ) shrank big-time as it dried out. This was just a fun egg for fall.

Fumes from baking polymer clay

Just posting this for several reasons:

  1. I am a big fan of working with polymer clay.
  2. I dislike the smell of polymer clays when they are being cured, even at the lowest possible temperature
  3. I get a heavy chest when I breath the fumes which escape from my conventional oven when I bake polymer clay even at recommended temperatures.
  4. I have been a scientist in environmental health for 38 years.
  5. I know that technology outpaces research on new chemicals, devices, techniques and meds.
  6. Linked below is a reasonably put article which is a little on the “dont ever” side, but gives some facts that everyone who handles or cures polymer clay should at least read.
  7. I googled this issue because I know there are those with “multiple chemical sensitivity” where I might tend to include myself and so post this as an FYI.
  8. I use gloves when working with polymer clay, yes its not great, and sometimes I take them off, but always wash my hands thoroughly.
  9. I will search for a small oven to put OUTSIDE my house for curing polymer clay. THE ARTICLE PDF IS HERE

Mouse, snake and egg polymer clay sculpture

This was a little tongue in cheek (or mouse in snake) egg and polymer clay creation. There is a cute little grey mouse which is poking out of the side of a snake.  The lump in the snake is created with a cockatiel egg covered with polymer clay, then hole drilled, and the body of the snake before and after was created with a rolled length of polymer clay then egg and body mweek_27_snake_egg_mouse1olded together. The snake diamond cane was applied to the outside after the parts were cured together, and the little mouse, created and cured separately was wiggled through the hole.  Positioning the mouse so that eyes and nose pointed outward was a little bit of a task (LOL). All in all, not my best egg sculpture, but it has a design potential to be fun to expand on.

Dragon egg: polymer clay

This little egg was a construction nightmare to create. I don’t know how many processes of curing it took. I know getting the center continuation of the little dragon’s body was the toughest part.  I like his tongue sticking out, ha ha.  It began with a real chicken egg, as most of the eggs on this blog.

dragon_egg


All craziness in a polymer clay egg with glass eyes

This egg was totally NOT fun to do, so many problems, and if you shook this egg you would find that one of the “glass eyes” was actually inside… ha ha, which I replaced with a clear marble after the fact. This egg was first covered in translucent polymer clay, then cured, and then I drilled out 5 or so holes, and used polymer clay to “seat” some glass globs within those holes. I cured it again, and added some of the stringing detail, then more and and more, and finally decided to cut my losses on this particular design.  It looks like something “frosted” for a birthday.  I use “primer” to paint the eyes, then put in the pupil, and then fluorescent yellow paint to make the white part glow.  “certified”  ha ha.

glass_eye_egg

Egg and polymer clay: Pumpkin with fluorescent interior

This egg was certainly fun to make. I used the roundest of the chicken eggs I had previously blown the contents from, then made wedges (thicker center than edges) to put around the equator of the egg top to bottom making the egg appear rounder and giving the pumpkin ridges.  I smoothed the wedges together and before curing i scored the areas for the eyes and nose and mouth and teeth and the top scallop where I could cut out the top.  the hole in the egg (to let the hot air escape during curing so as not to cause bubbles) was saved for the stem.  I sanded the egg lightly then cut the eyes and nose and mouth and top part out using a razor blade, trying not to break the whole egg.week_43_pumpkin-egg

After pieces were separated I used a blade to carve the edges clean, and sanded smoother (i didn’t sand this as smooth as i could have…. I am not that good a craftsman and bore too easily).  After sanding, i made the eyes of black polymer clay and added the stem to the lid, put a black ring for a stand, made a small candle which I placed in the interior and cured the egg again.  After some more sanding, I sprayed some fluorescent yellow paint into a plastic cup (one from the sampling at Kroger LOL, that I would feign to throw out) and painted the inside of the pumpkin (white eggshell still present acted as a nice white base color).

In the sunlight the eyes mouth and nose show up pretty nicely.  It is a fun idea, and would be a good craft for the kids.