This puzzle was made just for my own edification to establish when the earliest christmas celebrations occurred and which pagan rituals were incorporated. It almost seems cliche to say that we think we are so smart, but in fact just about everything we do has roots somewhere millions of years ago, part of the biology that we all possess, and the feelings, and needs, and cosmic changes and hopes and fears, and legends and truths.
What I found most interesting is how the christmas holidays were really considered frivolous, and banned, and lobbied for and against in the last few thousand years. It seems a little silly for anyone to get all bunched in a knot over it at all… it began as a cluster of winter pagan rites, it is currently as pagan as merchandising could make it, it has proponents and opponents, and it all boils down to “choice” Celebrate christmas as LOVE, then everyone is fulfilling the name it has been given. I doubt that anyone in heaven would suggest any other reason for christmas than LOVE. Here is an image, puzzle and answers, and a link to play online, and a link where i will send you the pdf to print and distribute. MERRY XMAS. Here also on the subject is the christmas article on birth and death of christ by Mike Jarvis ” Update birth and crucifixion dates of Jesus Mike Jarvis“, which is always a good read.

ACROSS
1. Historians such as Louis Duchesne, Hieronymus Engberding and Thomas Talley maintain that the Christmas was celebrated ______ Sol Invictus,
2. In Christingle celebrations a red ribbon wrapped around the orange represents the _____ of Jesus,
3. Plymouth Pilgrims in 1620 did not celebrate their first Christmas Day in the New World ________ their first structure instead,
4. Between 4 and 6 BC is the most accepted ____ for the birth of Jesus,
5. The records of Josephus are used to determine the death of King Herod at the time of a lunar _______,
6. Chronology for many events in the life of Jesus are found in non-christian Greek, Roman and ______ chronicles,
7. Jesus was born in Bethlehem in accordance with ________ prophecies,
8. September 11 3 BC when the constellation Virgo had the ____ at her feet 6-18 pm to 7-39 pm and is an astrological sign of Jesus birth date,
9. The order for tax and census by Caesar Augustus is not _______ enough to establish a birth date,
10. The ______ or hibernal solstice in midwinter is a celebrated astronomical phenomenon,
11. Christian Council of Tours of 567 AD established ______ as the season of preparation for Christmas,
12. Jesus might have been born in the fall of 3 BC and crucified on passover at the ___ of 32 and a half,
13. The _________ or conjunction of Jupiter and Saturn in 7 BC is a possible indicator of the of star at Jesus birth,
14. The concept that Jesus was conceived on March 25 came to be celebrated as the day of ____________,
15. The magi from Persia were priests and __________ in 600 BC but later renamed as Kings about 600 AD,
16. Late in the 20th century Christmas celebrations were prohibited under the doctrine of state _______ in the Soviet Union,
17. With the atheistic Cult of Reason in power during the era of Revolutionary France some Christian Christmas religious services were______,
18. Jesus was born while King Herod was in power and whose death in 4 or 5 BC __ is used to estimate Jesus birth,
19. Puritan members of English parliament considered Christmas a popish festival with no ________ justification and a time of wasteful and immoral behavior,
20. Christmas is celebrated by religious and a secular holiday by over 2 ________ people,
21. It was largely set out by historian Sextus Julius Africanus that Jesus was ____ on December 25 for which the Western Christian Church has used as the date for Christmas,
22. A Christingle usually consists of oranges sweets and a ______ which represents the light of Jesus,
23. Charles Dickens linked worship and feasting at Christmas within a of social reconciliation in his book titled A Christmas _____,
24. Biolgy suggests festivals with eating are related to building winter reserves of fat and gaining weight to protect one from ____,
25. Christmas was not proclaimed a holiday by the United States ________ until 1870,
26. Many modern traditions such as the Christmas tree and the Christmas wreath the Yule log and others are direct Yule _______,
27. The _____ of Jesus is generally believed to be between 30 and 36 AD,
28. The eclipse lnked to Jesus birth took place on March 13 4 BC but there were also 32 other ________ during the reign of Herod,
29. Emperor Aurelian probably established Dies Natalis Solis Invicti in order to compete with the Christian _____ of Christmas,
30. the Quran references a fruit branch which Mary shook as she gave birth with _____ known to ripen during the summer and it is unlikely that I would use this as a reference,
31. Herod was in very bad _____ just after Jesus birth and died within a few months or years,
32. The data for the time of the death of King _____ are not that strong according to the NCR,
33. By the time Herod was informed by the magi that a king had been born Mary and Joseph ___ the child by moving to Egypt,
34. Worry over the use of the word Holidays instead of Christmas is nonsensical since the word means ____ day so what could be better,
35. Some christian sects like ________ Witness reject celebration of Christmas,
36. Other methods of calculating his birth put the date at either ____ or January,
37. ____ Charles II in 1660 ended the ban on Christmas celebrations,
38. All terms for the winter holidays can be considered politically correct since Christmas is the blend of ____ traditions,
39. Iranian people celebrate the night of the winter solstice as Yalda Night,
40. Christian Council of Tours of 567 AD declared the twelve days between Christmas and Epiphany to be ____ unified festival,
41. In Nazi Germany organized religion as a whole was attacked as an enemy of the state and Christmas celebrations used to serve ______ ideology,
42. Jewish law said that a man could become a _____ at 30 years of age helping to estimate Jesus age,
43. Astrological symbolism found in the book of __________ are part of the story determining the exact day of Jesus birth,
44. Historian Ronald Hutton believes that the observance of Christmas is largely the result of a popular _______ of a mid Victorian holiday,
45. Two other astrological dates for Christ’s birth are during the conjunction in august 3 BC and _________ 11 3 BC,
46. Was the Christmas star an astrological or an astronomical ____ phenomenon or both,
47. Gregorian or _____ calendars define many holidays but lunar calendars are used as well,
48. The day with the shortest period of daylight and the longest night of the year is called the ________,
49. What type of ____ in the east did the shepherds see-was it an event or a prophesied zodiac sign,
50. Twelve _____ surrounding Virgo are Pi Nu Beta-ecliptic Sigma Chi, Iota Theta Star 60 Delta Star 93 Beta-2 and Omicron,
51. Two astrological events which might indicate the birth date of Jesus are the Triple conjunction in 7 BC or the 6 one in BC _________,
52. Caesar Augustus Silver Jubilee celebration in 2 BC might have the census and ___ been which brought Joseph and Mary to Bethlehem,
53. The date of the building of the Jerusalem ______ is used in part to establish the birth date of Jesus,
54. In Cristingle celebrations an orange represents the _____,
55. Lighting of the Advent ______ was invented by Lutherans in the 16th century Germany,
56. A conservative organization called the Church League of America said the use of an ____ in writing Christmas was blasphemous when x or Greek Chi is an ancient symbol for Christ,
57. Tiberius Caesar’s fifteenth ____ of reign helps determine the birth date of Jesus ,
58. The _____ of 5 BC is a good choice for the Christmas star which shone for 70 days and had a tail as pointed out in early illustrations of the birth place,
59. About the thirteenth century celebration began to including sing Christmas ______,
60. Third to forth century bishop from Myra in _____ Turkey may be the first St Nicholas,
DOWN
1. The lighting of a Christingle was invented by Moravians in 19th century _______,
2. Even in Jerusalem there are sometimes those who try to _______ the use of trees in celebration of Christmas,
3. The date of the beheading of John the Baptist is also used to _________ the birth date of Jesus,
4. The season of Christmastide, which historically in the West lasts twelve ____ , culminates on Twelfth Night,
5. The eclipse was recorded by Josephus because of the execution of Rabbis Judas and Matthias who tore down a golden _____ which Herod had placed over the eastern gate of the temple,
6. Also the constellation Leo for the tribe of _____ was in the nearby sky,
7. The Christmas star shone for 2 years before the ____ arrived to visit the Christ child,
8. John the Baptist was approximately six ______ older than Jesus,
9. John records 3 ________ celebrations during Jesus ministry,
10. The wonderful fact is that we each can determine the ___ we want celebrate Christmas,
11. Three years BC is another estimate for the _____ of Jesus,
12. Christmas observance was outlawed in the US city of _____ Massachusetts in 1659,
13. Plymouth Pilgrims in 1620 when they spent their first Christmas Day in the New World ________ their first structure avoiding the celebration,
14. The Lutherans also participated in marking of an Advent calendar in the 19th _______,
15. Ziemassvetki is an annual festival in Latvia which observes the winter solstice and birth of Jesus ______,
16. The non religious works of historians Josephus and Tacitus are used to estimate the date birth and the date of Jesus ________ ,
17. The road to ________ experience of the apostle Paul is also used to fix the birth date,
18. Astronomical data are often used to establish _____ in antiquity,
19. King Herod may have ____ as early as 1 BC but some put his death closer to 4 or 5 BC,
20. In Christingle decorations the fruits of the _____ and the four seasons,
21. His birth date was placed on December 25 by counting forward from a presumed conception in the spring ______ March 25,
22. The constellation of Draco was the ____ dragon as written by John in Revelation and he would have been very familiar with the constellations in place around Jesus birth,
23. The Nativity ____ is a period of abstinence and penance practiced by some orthodox churches in preparation for the nativity,
24. In 1647 Puritans in Parliment banned the celebration of Christmas replacing it with a day of ______,
25. The December 25 date for celebration is based upon an existing _____ rather than an historically accurate date,
26. It seems ridiculous that the state of California lobbies back and ___ at calling the tree a Christmas tree or Holiday tree,
27. Many cultures began Christmas traditions around the winter solstice as it coincided with darkness and cold and ______,
28. King Herod’s decree to kill all the male _______ under 2 years old probably bracketed the anticipated age of Jesus birth,
29. the ___ had no room and so they were offered a stable where the Christ Child was soon born,
30. The reference in Revelation to the virgin could represent ______ ,
31. The birth date of Jesus is determined by gospel accounts and by working backwards from dates in the ministry of _____,
32. A ridiculous conspiracy theory is that ____ introduced Santa Claus to suppress the New Testament accounts of Jesus,
33. In the 17th century the Puritans had ____ forbidding the celebration of Christmas, unlike the Catholic Church or the Anglican Church the latter from which they separated,
34. Neither Matthew nor ____ mention a season for when Jesus was born,
35. December 25 and January 6 coordinate the solar Julian calendar with the _____ calendars,
36. Sextus Julius Africanus an historian of the second century suggests Jesus was conceived on_____ 25 which the Christian Church came to celebrate as the Feast of the Annunciation,
37. One of the requirements for the Christmas star was that it ____ with time as a comet would do,
38. Sometimes the celebration of Christmas has been criticized by _______,
39. The Festival of Trumpets is the first day of the ___ year Rosh HaShanah and Christ makes all things new,
40. One possible explanation for the star is a ____ or supernova but this would have been a fixed event,
41. Using dates calculated around some duties of rabbis at Feast of Tabernacles Jesus could have been born in late September or early _______,
42. The _____ Scandinavian and Germanic people of northern Europe celebrated a twelve-day winter solstice called Yule also called Jul Julblot or julofferfest,
43. The New Testament states that _____ was born in Bethlehem in accordance with ________,
44. Following the Puritan ban on Christmas _____ broke out in several cities and for weeks Canterbury was controlled by the rioters,
45. Interpretations are world wide and diverse representing rebirth holidays festivals gatherings _______ and celebrations around that time,
46. September 11 3 BC was the first day of the _______ month on the Hebrew calendar which is the Feast of Trumpets,
47. Jesus was ___ months younger than his cousin John the Baptist thus Jesus was likely conceived in March and born in late December,
48. The climate in Palestine would allow baptism of an individual in ______ summer and fall,
49. Christmas was not widely celebrated in the United ______ even as late as 1776,
50. AD 274 Emperor Aurelian made a festival for Sol Invictus which means The Unconquered ___ December 21 originally a Syrian deity who was later adopted as the chief deity of the Roman Empire,
51. It was in the _____ century that the December 25 date was adopted as the birth of Jesus,
52. The Romans believed Sol died on December 21 before being reborn _____ days later on December 25,
53. The solstice may have been a special moment of the annual cycle even in neolithic ____,
54. It is likely that because people were returning to their home ____ to pay taxes there were no vacancies in Bethlehem,
55. Under Marxist-Leninist doctrine of state atheism Orthodox Christian priest were forbidden use _____ in the celebration of Christmastide,
56. The 12 stars around Virgo’s head can symbolize the 12 ______ or sons of Jacob,
57. The ___ on Christmas occurs mainly in countries such as the United States and Canada,
58. In Great Britain it was suggested to use the word _________ instead of Christmas season,
59. The length of the ministry of Jesus was between 1 and 3 _____,
60. An interpretation of the Gospel of Luke places the appearance of the messenger Gabriel to Zechariah on ___ Kippur that occurs around October,
61. A winter celebration was known as ____ Log has pagan origins but after the Christianization of Scandinavia it likely was incorporated into Christmas,
62. According to lore and _______ comets are predictors of both good and bad events,
63. The words anno Domini appear for the first time as 25 December 336 __ Natus Christus in Betleem Judeae,
64. The magi made their trip from east which is now called ____,
65. The first present giver might have been a legendary charitable ___ of 4th century Lycia who threw gifts into homes,

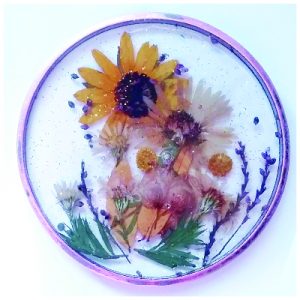
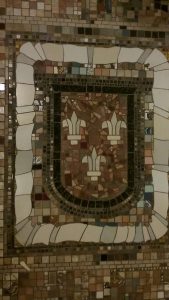



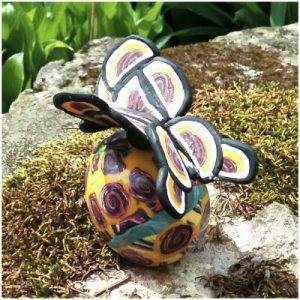
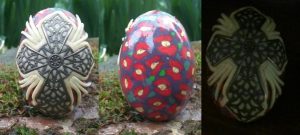
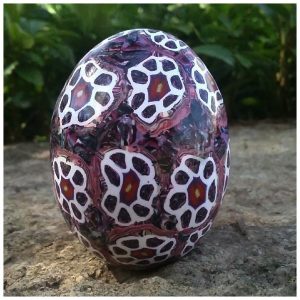
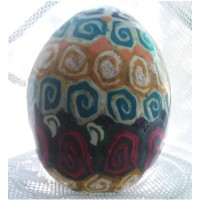 making this something of a memorial egg. I did several, and also for the nieces and nephew of the individual whom these honor. The names are seen in the flower petal polymer clay cane eggs made with some alphabet stamps.