Raggedy ann and andy bread dough ornaments, bit the dust.

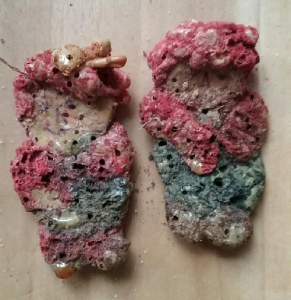
Raggedy ann and andy bread dough ornaments, bit the dust.  I was really surprised (I don’t know why, I have had bread dough sculptures get moldy and soft and buggy before) when I unpacked christmas tree ornaments this year.  Ha Ha. Poor raggedy ann and andy….  they took a severe dusting this year in the cedar closet.  This is spookier than “walking dead”.

I had actually been a little sad looking at all the ornaments made with my children, and not a single one will be in town, nor any of my grandkids… So was just a bit sour, then found these, and that surely brightened the day.  Ha ha ha.

I don’t know what the half life for your bread dough ornaments is, but these have been around for almost 40 years.

Tiny cockatiel egg: pysanky

I had fun trying to learn how to get dyes to take on tiny cockatiel eggs. They actually have a pretty non-porous surface compared to other “washed” eggs. They are also pretty fragile and I broke several just trying to get the insides cleaned out.

This tiny one was made sometime in the 1980s i believe, and it is about an inch in height.

cockatiel_pysanky_egg

Pumpkin with fluorescent interior

I invented something funny here, at least I didn’t copy anyone else, but probably somewhere in the world someone has made carved a pumpkin like this and made the interior fluorescent.  The idea came to me after I made a little pumpkin egg sculpture out of polymer clay (found HERE), and then I wondered whether I could make it into an actual pumpkin size carving.

  1. carve the pumpkin
  2. scrape the edges really well, and pat dry
  3. wait until the interior is pretty dry to the touch (I ended up putting this whole big pumpkin in the oven at just over 100 oF for an hour or so.
  4. Paint the interior with a stain blocking primer (I used water based Kilz) and let that dry for several days.
  5. Spray paint the interior of the pumpkin with fluorescent yellow spray paint (well I used spray paint, but I think a jar of paint would have been a better idea.

fluorescent_pumpkin

Little egg bear made with polymer clay

Egg for the body (emptied, then covered with a very thin layer of polymer clay) and head made with a large wooden bead (covered with a very thin layer of polymer clay, scored at the equator before baking for easy separation and removal of the bead), and then cured.  pieces are put together wit

week_33_bear_egg

h polymer clay, and legs and nose and ears are added, and eyes drilled, and cured again.  A good sanding, and carving with a tool for linoleum carving was used, but any carving tool that suits you is fine.

Bear was covered with dark acrylic paint, and rubbed to lighten, and different shades of brown acrylic paint were used to give the carved places a feeling of depth.  Not a perfect bear, but I will keep him.

week_33_bear_egg_1