BMW art cars (my 320i flower car in the middle)

Could not resist putting my first BMW art car in the midst of all these famous cars.  I think it is nice, and surely not like the others.  Two 320i cars I have painted with flowers, and one of them I used gallery glass to make dimensional flowers, but didn’t like it (the texture just kept holding the dirt and grime) so i removed it and put the BMW logo flowers on it instead.  That second car I had only just finished painting when someone ran a red light and T-boned it…. totaling it, I was so sad…  In truth, it had become such a “bare-bones” transportation vehicle, no air conditioning, seats beginning to wear out, interior rugs just thread bare, I think it was time.  So that car is posted HERE, and my first painted BMW art car is posted below. My flower car BMW is not painted by a professional car painter, LOL, but surely one who loves BMWs and flowers.

320i BMW art car flowers Marian Miller


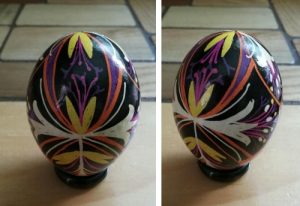
Two more pysanky eggs from the late 1990s

I enjoyed doing this craft for many years, but moved to mosaic and also to polymer clay. I still have some of the dyes and am waiting for inspiration on how to combine all three types of egg decorating into a single egg. Well, maybe also add a little etching and carving. But these were fairly traditional pysanky.

pysanka dying of chicken eggs

While they are not particularly inspired, some of the chicken eggs (just from the local grocery) dyed pretty well. My guess is that currently the eggs are so treated, washed and bleached that they would be scarred and non-receptive to the dyes.

batik eggs pysanky chicken eggs decorated

Daisies and dots pysanky egg

This is kind of non-traditional pysanka, daisies and dots on a chicken egg.  It is from the mid 1990s I believe, when all my kids were doing pysanky with me, weeks on end in the spring. As I look at this it looks more like one my daughter would do than one I would do, I will ask her.

pysanky eggs daisies and dots

Large paper egg with polymer clay overlay: redo

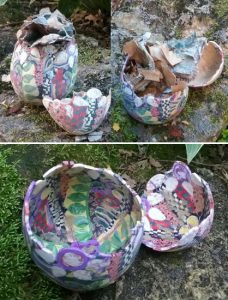
So I posted before this small disaster, LOL, coming to grips with failures and experimental mistakes is somewhat frustrating. I cut apart that egg which wasn’t working out well, (you can see the paper inside had gotten misshapen from all the sanding with wet sandpaper I had done) and I cleaned it out, soaking off, and sanding off, the remains of the paper (it was a combination of chines news and news in english LOL).  The inside was kind of cool, and I am determined to figure out something to make this fun and interesting.

For starters I need to bolster the rather flexible polymer clay egg itself, which I suppose I should do with liquid polymer clay in a fine coat first, on the inside.  If it stabilizes enough I can sand the outside more.  I did think a little dragon (multicolored) coming out of this large egg would be fun….  i have never created a structure that would be as big as a dragon would need to be to be in proportion to this rather large (5 inch) egg.  The other option, much quicker and maybe just as cute, would be to buy a little stuffed dragon toy…  thinking. 

Chicken egg and polymer clay topiary sculpture

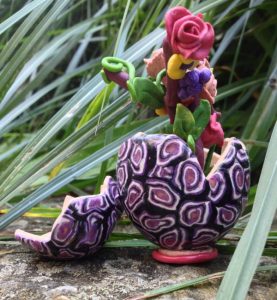
Polymer clay cane on the outside of an empty chicken egg, cured, then cut apart and turned into a small “pot” to place a little polymer clay topiary type bush. These roses and the bush were made with polymer clay with embedded flower petals, and so have deeper meaning than just a piece of artwork. You can have yours custom made. See many of the endless possibilities for such fun commemorative items NOT from china, but made custom for you HERE.

Paper egg and polymer clay

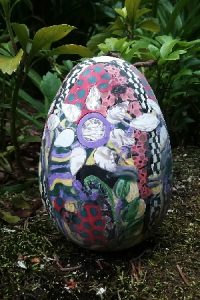
I purchased this large (maybe 4.5 inches high) paper mache egg from Joann Fabrics in the 70% off bin after easter this year.  I thought I could use it as a form on which to work some polymer clay to make a large polymer clay egg.

Not entirely successful, there were some surprises. I did poke a hole in it during baking (tiny at the bottom), and it was firm enough to easily put the clay upon. I did this in about 4 curings since didn’t want the shapes to get squeezed out when I added other slices.  This might have been a mistake… maybe doing it all at once would have prevented two problems.  1: it has taken a lot of sanding to try to get rid of the small deviations and divots in the surface, i mean a lot of sanding, perhaps an insane amount of sanding.  Not all were removed to my satisfaction so i filled some of the deeper depressions with new thin slices of polymer clay, which brought on problem 2: the different areas of polymer clay looked like they shrank away from each other with the last curing.

THis is another example of the choice to “cut my losses” or to try to figure out whether i can save this egg, and turn it into something nice.  I wish there were a forum to ask this advice, but enabling comments on wordpress is just asking for trouble.

Egg box with flowers, sunny side up

polymer clay and egg shell sculpture art

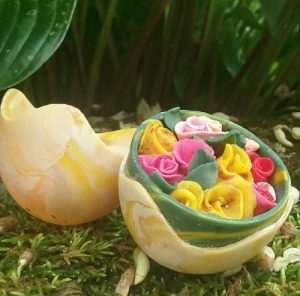
This was a fun egg to make. I covered the egg with a blend of translucent, yellow, salmon, white polymer clay and before curing carved out a serpentine line around the equator where I wanted to cut the egg after it was cured. This i sanded until smooth with 240, 400,  800 and 2000 grit sandpaper.  I used a razor blade and a push pin to separate the two halves, picked off the egg shell from the top half and around the inset portion of the bottom half and sanded the edges to soften and even up the two pieces as they fit together.

With green clay-mix i made a band for the inside of the bottom half of the egg box where the top half would fit over to close the egg box.  i cured this WITH the lid in place but coated the inside of the top half with baking soda to prevent the two halves from fusing, but also while maintaining the “fit”, as I was afraid one or the other half would warp during curing.

Next i covered outside a small portion of an egg shell with liquid polymer clay to give it a little extra strength, and also put liquid polymer clay on the inside of the edges of the egg box where the inverted portion of egg shell was placed to make a “platform” upon which to rest the flowers.  I cured the whole egg “with shelf” again (with the top on)…and with the baking soda to prevent fusing the lid to the box.  The shelf completed, i just pressed the rolled roses (lightly) roses and fit leaves between, onto the dome shape made with the inverted egg shell inside the bottom of the box. Just fun, nothing fancy or difficult.

Redo: polymer clay and chicken egg

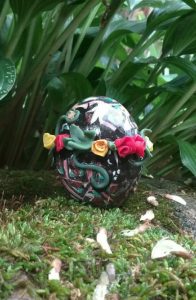
I never really liked this egg, made with a cane that was supposed to look like a quilt. (It does have flower petals in it, from a person who was a quilter and I was trying to make some kind of a keepsake egg in commemoration.)  Some how it was a little too chaotic and I wasn’t that happy with the colors. So the other day i decided to cut it in half (not difficult with a blade and a pin to poke through the two layers (first layer was translucent polymer clay) and twist the two two halves apart. The purpose was to insert a row of flowers between the layers to look like they were kind of “trapped”.  I added some black paint (which didn’t take that well) behind the flowers to accentuate.  Education is costly sometimes, in terms of time, but unless I learn by experimenting, I go nowhere.

Letting a cane rest: polymer clay eggs

Life is a learning experience, so is working with any medium, polymer clay included.  I so get interested in the process of figuring out a new medium (or for my work during the “real work hours” finding a new pattern in the ultrastructure of cells).  I don’t know about you, but for me it has to be hands on.  I love tutorials but I don’t know what questions to ask until I get my hands and elbows deep into the projects and the medium.  So here i learned that using an old cane and a new cane together (especially when the cane is made with a softer polymer clay like Premo or Fimo soft) that they work together in entirely different manners while under the same roller or finger pressure.  The star like flower cane of black and white and yellow and a red center is months old, maybe a half a hear, while the yellow red and white cane was made the same day as I began layering it on this chicken egg shell.  Working them smooth, one moved around enormously, the other stayed the same. The third cane white petals and black background and a dotted center was about one month old.  This is how I learn.  While one is not better, they sure are different.

learning about polymer clay covered eggs