Egg shell and polymer clay: Humpty Dumpty

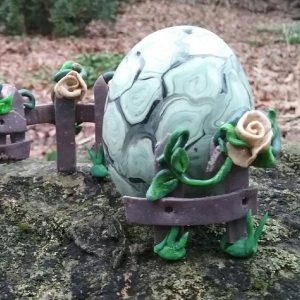
This egg was so fun to make, didn’t have to stress over it, except to check out some pictures of humpty dumpty to remember that his trousers were actually part of the egg-shape.  I started out with a medium chicken egg (i don’t think suppliers like to label things “small” but i think this was small), emptied the contents into the frying pan, and washed it out several times (routine).  I covered the whole egg first in a white-transparent and flower petal mixture of ground up yellow and white roses (you can see the flecks), reasonably thin layer and cured the egg (not forgetting to poke a hole in the bottom where the air could escape without creating bubble in the clay layer.

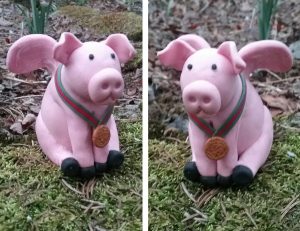
Nose and eyes and mouth and ears next, and blue for his britches. Cure, added legs and arms and shoes and tie and collar and cured again.  There is a little bit of varathane on his shoes, and bow-tie, and eyeballs, but I actually chose deliberately NOT to have him be shinny.  BTW where is a little blue jeans pocket on his backside.

Tomorrow is National Pig Day, here is a flying pig

My daughter and i ran the flying pig half marathon together. I made her an easter egg this year to commemorate the event (from two years+ ago), and according to the flying pig newsletter, tomorrow is national pig day — so it is a good time to post.

I also did the Big Pig Gig, i think it was in 2001, cant remember.  Pigs are big in cincinnati.  Here is a polymer clay and egg shell..flying pig egg complete with finisher’s medal.  I thought he turned out kind of softish and cutesi.

His body is a chicken egg covered once in pink and white and translucent polymer clay, the head was made separately but at the same time with same clay over a wooden bead (nose, ears and eyes as well), both were cured. Head and body were joined with some of the same polymer clay and rear and front legs added.  cured again, and then wings added (they have a part of a toothpick which was inserted into a small hole hand drilled into the back, and which also was positioned in each wing to help give it stability during curing.  I had to sand and sand and sand this piece, and it still could use some more sanding.   Finishers medal made separately (not removable, but also not pressed in or attached to the pig body, it can move around the neck. If you want one, you can find it on Memory-beads.com

My thoughts on viewing this again are, maybe the nose was too big, and it could use more sanding.  Ha Ha.


Pearls and flowers polymer clay egg cut out

This egg was one of the first that i cut out a portion of after the finding out online that one can carve out portions of an egg with a dremel. That just opened up all kinds of avenues for having fun with clay and eggs.  This one has faux pearls and a little flower pot with roses inside the cutaway. The specks in the flowers are flower petals from someone’s personal event, to be memorialized. Find out how to purchase such a custom egg on memory-beads website.

Holey egg

This egg surely was a surprise to try to finish, not the best egg in the world by a long stretch. I began by covering a small chicken egg with a rolled out layer of glitter-red fimo, marked out circles on that layer, then cured. I punched (with a push pin) out the circles (and saved them LOL) and then added a layer of orange, cutting out the holes over the original holes (for each additional layer similarly), then cured again, and added a layer of fluorescent yellow with additional fluorescent powder added), then cured, then a layer of green, and cured again. I put all the left over colors together to create a mokume gane for the top layer. When the egg was warm after each cure i tried tied to trim any extra clay off each of the newly added color. I chipped the egg shell out after all layers were cured. BTW, have you ever tried to sand the inside of such a structure. I could not find a tool, but finally put a pencil thin stiff bristle paint brush in the end of my variable speed drill. That worked a little, but finding the right angle for brushing off the inside of the areas between the holes was challenging.
When I began sanding I found that some fracture lines had appeared that I could not sand away. I don’t know whether I should have put all the layers on soft, right from the start and cured once….if perhaps each layer shrank and c
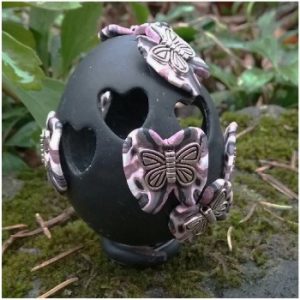
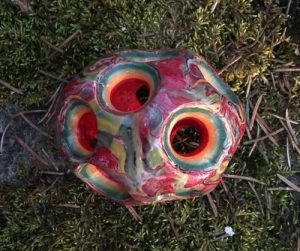
racked with the addition of each new layer? It seemed that the fluorescent yellow was the breaking point, but I would have to try to recreate the error, requiring several eggs to be made again (probably not happening). If I do try another layered holey egg, keeping all layers soft before curing it just once, it will be a black and white checker board egg…. It wont be a perfect test though, since the fluorescent layer wont be there.  BTW, the fluorescent layer did look cool in the dark.
After hours of unsuccessfully sanding out cracks, I just decided to cut my losses. The picture is terrible, it really is kind of an interesting sculpture.

Egg and polymer clay: rough hewn base and vines of roses

This egg was a little bit tricky to finish, not being an engineer I misjudged the weight of flowers made of polymer clay and the “wilting” of heavier structures as I cured the egg in different stages.  The end result is not stunning, but i kind of like the roughness of the base and cutout parts of the eggs, and the new look of the yellow red and golden roses.  I enjoyed finishing it.

Word wrap around a round object in wordpress: a test


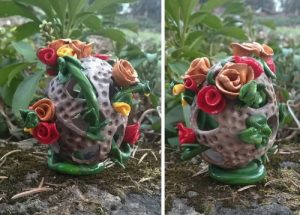
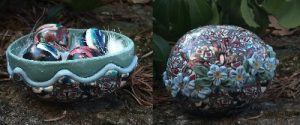
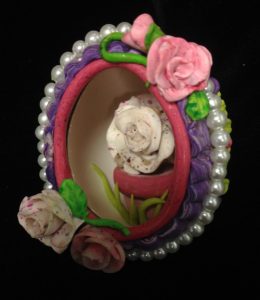
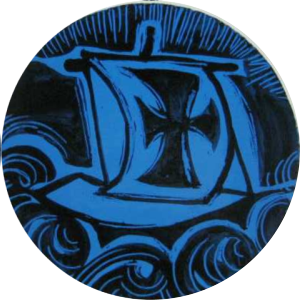
this is a test of whether i put the html code i got off the internet in the right place in my word press blog. the goal was to wrap the text around an object which is round. incidentally this pix was a medallion painted for a church and it represents the apostle jude – a ship on a stormy sea. the answer to word wrap is-that NOPE i didnt get it right. But my son did, and you can view it in chrome but not firefox or old browser versions of explorer

Valentine egg and polymer clay

This was just fun and easy to make. I used a butterfly cane (created for something else) with whites browns and black.  I rounded up the cane and just put slices on on willy-nilly, and didn’t forget to poke in an air hole (where the original contents of the egg was removed) so i didn’t get an expansion bubble and cured the egg.  Then i added a collar of the same cane, and made a separate ring stand for the bottom and cured again.  I drilled a hole in the top and built some leaves and added three oreo-cookie-heart-shaped -red-filled objects at the top (the stem on each heart cookie was a metal eye pin about 1.5 inches long (the looped part pushed into the red clay before pressing the cookie parts together.  After the hearts were assembled i poked the eye pins through the hole at the top and squeezed in the leaves a little to hold them in place, cured the egg a third time and sanded some rough spots. The whole thing is coated with Varathane.  I think this will be for one of my grandkids.

Egg – Spiral cane and flowers and fence

I struggled with the engineering on this egg, LOL, it is a good thing i don’t build bridges.  But the fence stays behind and the short part of the fence is actually attached to the spiral cane egg.  I had to prop and support these items when curing, since the tendency was for the fence to fall apart during that process and not stand plumb when resting on all the fence posts. The spiral cane was just left over clay with translucent in the center moving to grey and black at the outside. The fence was not sanded to make it look rustic. In retrospect, it might have been fun to actually use a technique to have it look like wood… mokumu gani?

Egg – black with cut out hearts and butterflies

This was a fun egg to make, not perfect, but I just covered a small chicken egg with an 1/8th inch covering of black polymer clay, smoothed it, then used a heart cutter to cut the clay down to the egg (carefully not breaking the egg). THen cured it and used a knife and push pin to finish severing the hearts from the body of the egg. After removing all hearts, and chipping away the egg from the inside, i sanded it and attached metal butterflies embedded in a black, brown and white cane (slitting the ends of the round cane where the top and bottom of the butterfly were, then separating it like wings (under the metal wings).  Cured again, and left without a finish.  I saved the black hearts for another project.

Polymer clay cane egg with forget-me-nots

Work in progress — this egg, trying to figure out how to put a band on the lower half inside so that it closes like an egg-box.  Translucent clay was rolled thin and put on the egg first, and scallops were carved out before the clay was cured. After curing, an exacto knife was used to puncture the egg shell along the lines of the scallop. The canes were left over, just joined and rolled a little and randomly put on the top and bottom halves and the egg was cured again.  what I forgot to do was to bind the bottom half of the egg so that it did not expand (sag) just a little and make it too big to fit inside the top half.  I did some sanding then put both halves into the oven just to heat them up, then each one was shaped a little while it was still hot (using potholders).  I added a blue rim to the base half and forget-me-nots and leaves to the top edge and cured it again.

I did manage to build a shelf on the bottom half of the egg so that the top now fits over the edges….. and made some little eggs with the left over canes for inside.